

How To Tighten Rad Power Bike Brakes
Bikes with disc brakes volition eventually make some amount of rubbing racket. Thankfully, yous can practice something about them if you feel unusual brake racket.
How to adjust
All cyclists should know how to adapt their bike brakes, and this post volition bear witness you lot exactly how to do that.
What You lot Volition Need
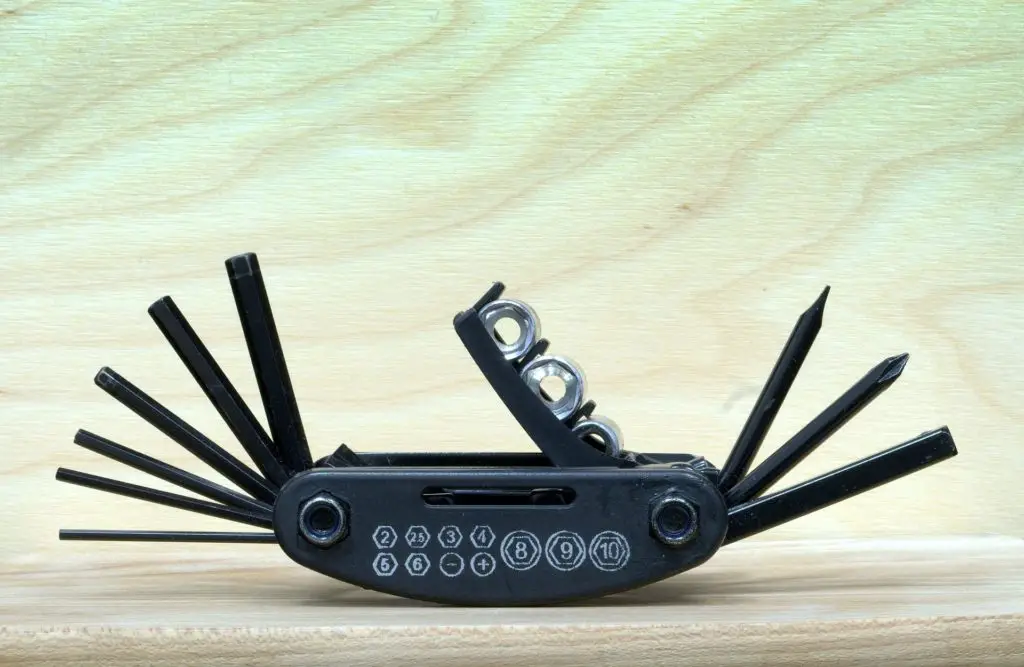
The tools you need for adjusting noisy or rubbing brakes for your bicycle model may not be the exact ones on this list.
While all mechanical disc brakes on
- Wrench (18 mm)
- Allen wrench (5 mm)
- Torque wrench with a 5-mm Allen fleck
- Torque wrench with a long socket head or an 18-mm socket head (depending on your cycle model)
- Apartment side cutters
- A canvas of newspaper
Annotation:
For 2019 or earlier models of RadWagon, RadCity, and RadCity Step-Thru, you volition need a rear restriction inner pad adjustment tool. You lot can get this straight from
If y'all plan to piece of work on your bike upside down, you should back up the handlebar grips with wooden blocks. The blocks will also protect the display.
More than: Rad Power Bikes RadMission 1 Review
Step-by-Footstep Instruction
Now allow's get into the steps for how to adjust
All the moving parts on your bike tin can be overwhelming and fifty-fifty intimidating. Only don't worry well-nigh them because yous only need to adjust two points at most. These are the barrel adjuster and the caliper.
The butt adjuster is the small metal cuff located at the brake lever.
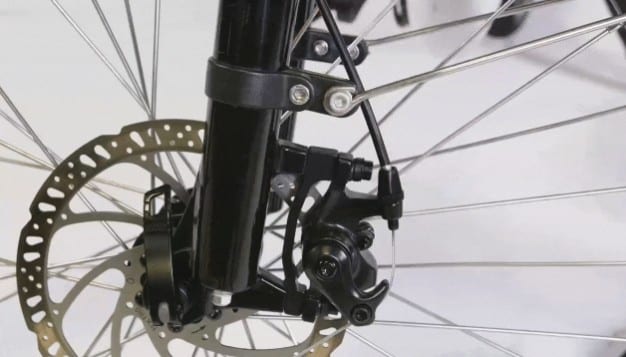
The caliper is the claw-like device located in the center of the wheel.
I'll pause downward the entire restriction adjustment process into unlike simple procedures, depending on the specific brake issue with your wheel.
More: Are Rad Power Bikes Waterproof? Tin You Ride Rad Ability Bikes in the Rain?
Step 1: Get Your Wheel Ready and Make up one's mind the Misalignment
First things first, yous want to prepare your bicycle for maintenance if you notice a braking noise or problem.
To do this:
- Turn off your bike and remove the battery.
- Printing down the power or mode button for a few seconds. This will discharge the remaining ability.
The quickest fashion to decide if your brakes are out of whack is past pulling on the brake levers. This will tell you if your brakes are too tight or besides loose.
Both brakes should brand full contact with the rim'due south surface or else you lot demand to effigy out which brake requires adjustment.
More: Rad Power Bikes RadRunner 1 Review
To do this:
- Pull the brake levers.
- Notice the corporeality of contact between the restriction and the rim of your wheel.
- Does one side clasp loosely?
- Does one side non squeeze at all?
- Does one side overlap the rim?
By observing this, you lot should be able to figure out where the misalignment is coming from.
Here's something you should remember when you pull the brake levers. The correct lever controls the rear restriction while the left lever controls the front restriction.
Footstep two: Adjust the Barrel Adjuster
Ideally, the brake lever should clasp easily upwards to virtually ane to one.5 inches earlier condign stiff. If this is not the case, your levers are besides tight and you need to loosen them.
On the other manus, your brakes are too loose if the levers touch or almost touch the handlebars when you pull them. In that instance, you need to tighten them.
To suit the butt adjuster:
- Loosen the lockring.
- Twist the butt adjuster toward the brake lever to tighten it.
- Twist the butt adjuster abroad from the lever to loosen it.
Here's a quick video demonstration.
In some cases, adjusting noisy or rubbing brakes is simply a matter of tightening or loosening the barrel adjuster. This step is especially useful if you're out on a ride and need a quick way to address braking issues temporarily.
If this stride does non solve the trouble, y'all need to follow the rest of the instructions on how to adjust
More than: Rad Power Bikes RadCity 4 Review
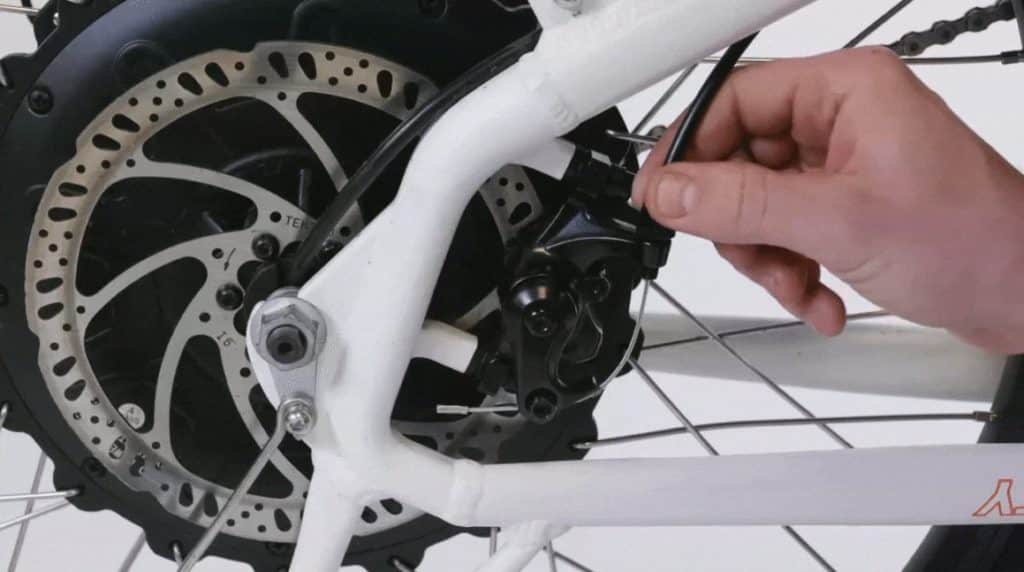
Step 3: Conform the Restriction Cable Tension
The cablevision on the brake caliper may exist besides tight or too loose if you lot're yet having braking issues after adjusting the butt adjuster.
To conform the cable tension:
- Locate the brake caliper and loosen the lockring on the barrel adjuster.
- Loosen the cablevision pinch bolt using a five mm Allen wrench. The goal is to allow the cable to motion freely without removing the commodities completely.
- Pull the brake cable downward every bit you lot button the caliper arm up. You want to make sure the cable is stretched tight.
- Now, tighten the cable compression bolt.
- Spin the bicycle to brand sure information technology spins freely.
More: Rad Power Bikes RadMini 4 Review: Worth Ownership?
Step iv: Check the Wheel Position
If the brake is tight just right but the noise persists, the wheel may not be centered in the fork dropouts.
To check and suit the position of the front cycle:
- Showtime by opening the quick-release lever.
- Turn the thumbnut counterclockwise. This volition make more than room for the fork dropouts.
- Make sure the cycle beam is centered and in line with the fork dropouts as you lower the bike onto the beam.
- Turn the thumbnut clockwise while leaving the quick-release lever open up. Do this until the lever can stay parallel to the ground without you holding it.
- At present, utilize sufficient force per unit area to shut the quick release.
More: Rad Power Bikes RadRover five Review
To check and adjust the position of the rear wheel:
- Flip your bike upside downwardly, making sure the handlebar grips residue on wooden blocks.
- Loosen the axle nuts on both sides of the bicycle using an xviii mm wrench. Y'all don't want to completely remove the nuts equally that will increment re-assembly time.
- Arrange the cycle, making sure the beam is level and the wheel is centered in the dropouts.
- Tighten the axle nuts using the eighteen mm wrench.
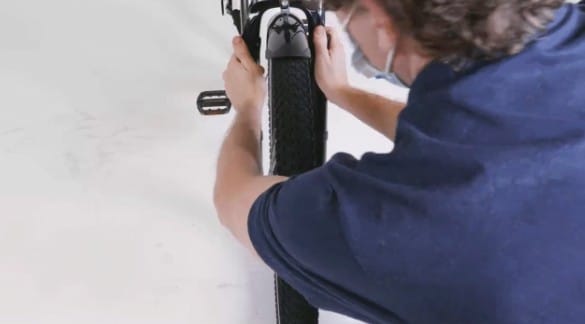
Step five: Bank check the Restriction Rotor

Next, yous desire to make certain the brake rotor is in optimum condition. Brake noise tin can occur if the rotor rubs against the restriction pads as the wheel spins.
To check the status of the brake rotor:
- Flip your bicycle upside down to check the rear rotor or prop information technology on its kickstand to bank check the forepart rotor. You want your bike to be in a position that volition give you a improve view of the rotor.
- With the wheel in the proper position, spin the bike. It should spin freely if there is no contact betwixt the rotor and restriction pads.
- Take a sheet of paper and hold information technology behind the brake caliper. This will allow you to see if the rotor wobbles or not as the wheel spins. You may need to get a replacement if the rotor does not spin straight or you lot suspect it is damaged.
- Apply the brake lever if y'all need to finish the wheel from spinning.
Pro tip: Never impact the brake rotor to avoid injury. This is especially true when the wheel is in motion. Touching the rotor can too crusade your bike to squeak and reduce your brake performance.
More than: Rad Power Bikes Radwagon four Review
Pace half-dozen: Test the Brakes
Finally, after adjusting your bike'south brakes it is time to put all of that hard work to the test. Hopefully, it will exist worth the effort.
To do this:
- Go ahead and reinstall the battery. Brand sure to follow the instructions to correctly install the bombardment.
- Test the brakes past riding the bike in your backyard or somewhere safe without traffic.
Let me end this post with this quick caution: exercise non ride your bike without fully testing it in a condom place, even if y'all're sure you followed every instruction to the latter.
Testing doesn't take more than than a couple of minutes, so exercise non let the excitement of riding your
Remember that brakes are critical to your condom while riding your cycle. Information technology is all-time to accept a more experienced person to work on your bike if y'all are unsure about performing the to a higher place steps successfully.
More: How to Clean Rad Power Bike
Conclusion
There you have information technology – how to adjust
I like "connecting" with my bicycle, and being able to fix a brake rubbing racket is one of the ways I practise this. I encourage y'all to try information technology, too!
Besides, adjusting noisy or rubbing brakes yourself tin salve y'all some coin since you don't take to pay someone else to exercise it for you.
I'll similar to hear your thoughts or questions in the comments. And remember to share this post if you liked it.
Source: https://outdoorlabwithj.com/how-to-adjust-rad-power-bike-brakes/
0 Response to "How To Tighten Rad Power Bike Brakes"
Post a Comment